Create a roc instance
This guide shows you how to create a roc Enterprise instance in the evroc Console.
Prerequisites
- An evroc project
- The
thinkOperatorrole on the project. See Permissions and roles.
Creating an instance
-
Log in to the evroc Console and select your project.
-
In the sidebar, under evroc Think, select roc Enterprise.
-
Click Create.

-
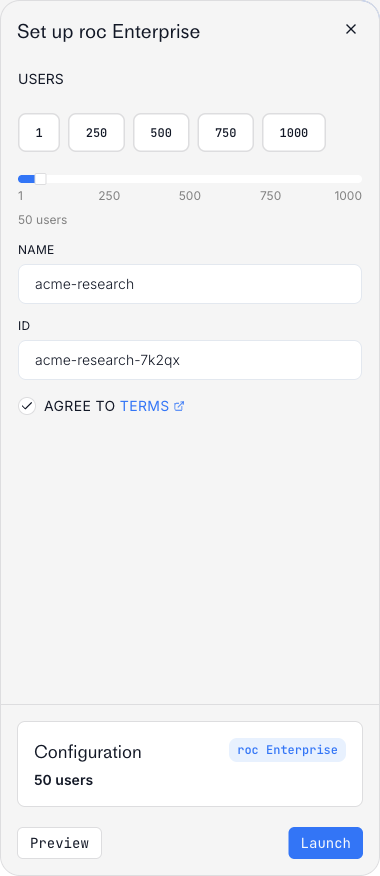
Choose the number of seats. Select a preset, or use the slider to pick any number from 1 to 1000.
-
Enter a Name for the instance. The name must start with a letter or number, and can only contain letters, numbers, spaces, underscores, and hyphens.
-
Optionally, change the generated ID.
-
Agree to the terms.
-
Click Launch.
After creating
- The instance appears in the roc Enterprise list in your project.
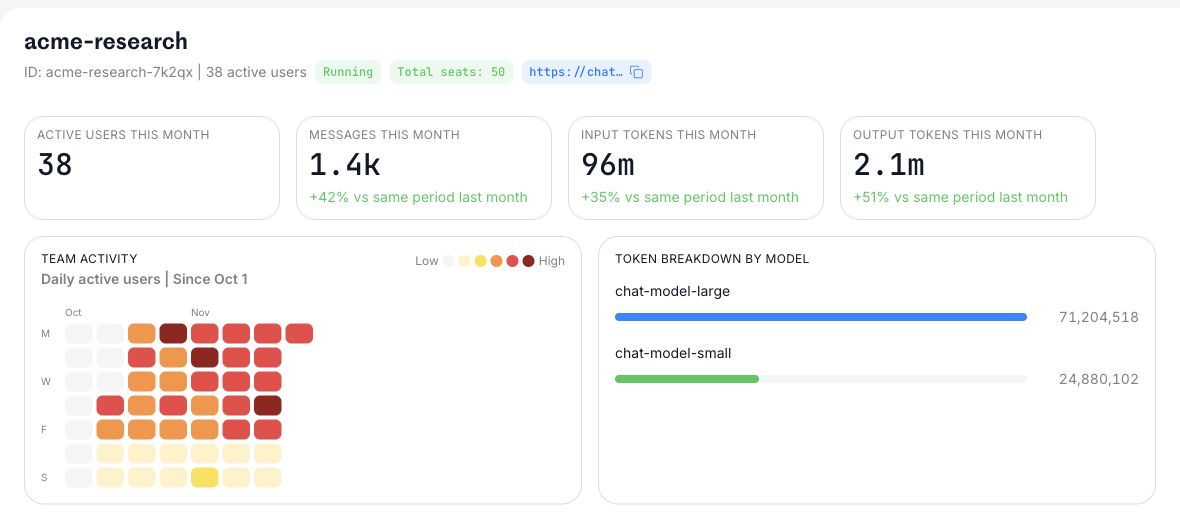
- Open the instance to see its endpoint and total seats. Share the endpoint with your users.
- The instance page also shows usage for the current month: active users, messages, tokens, daily activity, and token usage per model.
Next steps
- Manage users - Invite users to your instance